Generic Artwork
All our infrastructure uses standard artwork in a variety of ways. For instance, events, articles, and other content, displays header and social media sharing artwork.
Artwork is attached as file attachments to any entity (such as events or articles). They use category and sub-category assignments to identify the artwork as such.
It is important that we generate as much original art as possible, and assing it to various elements in all the required formats (see below) to ensure proper rendering and display of our “stuff” on different platforms and sites (such as our own web sites and mobile apps, as well as places such as Facebook, LinkedIn, and more). To make this possible and feasible, we have created a variety of tools and processes.
The Standard Art Creation Process
Many of our “assets” (such as articles, blog posts, events, consulting service offerings,...) require all the art assets listed below to be displayed in their most flexible and effective form. We therefore must create all these art assets as efficiently as possible. This is usually done through the use of Artificial Intelligence and Copilots.
The first step is usually to click the Generate Art toolbar button that can be found in various parts of our system (such as the article edit form, the blog post form, the event edit form, and more). This launches the following UI:
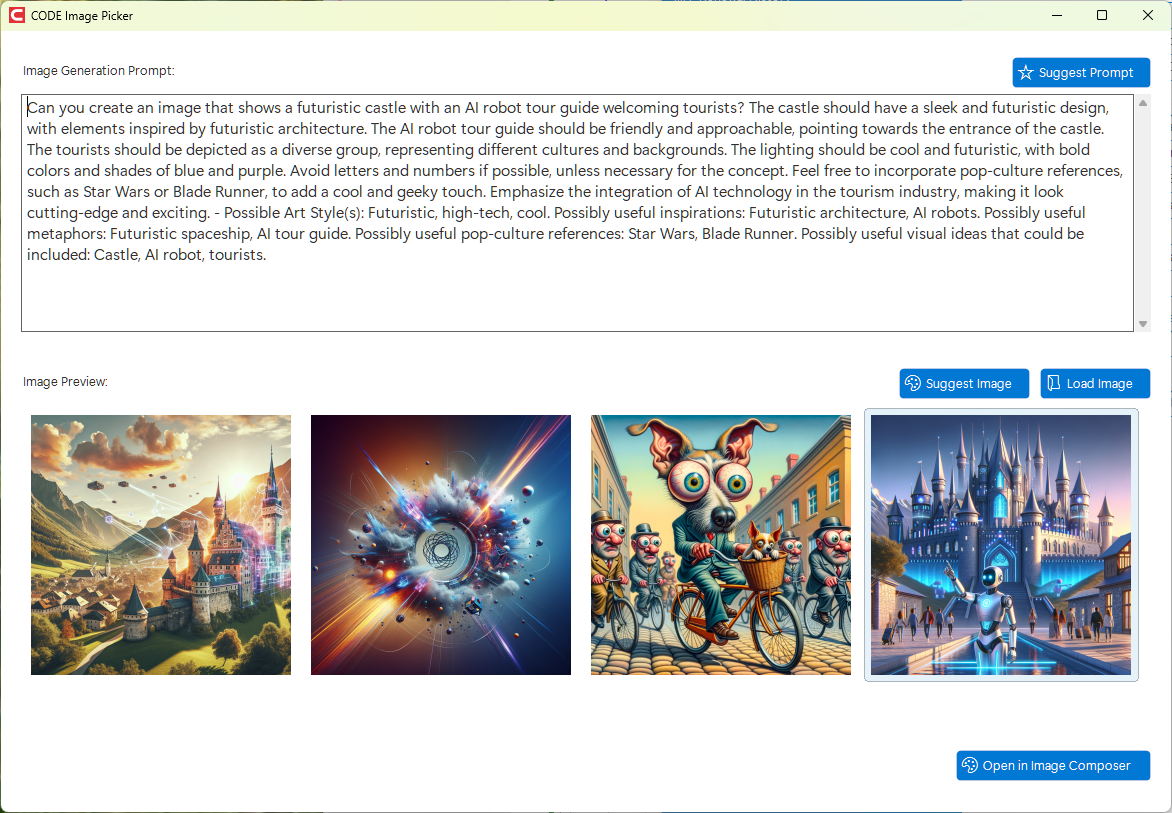
An Image Generation Prompt
The above UI is designed to use Artificial Intelligence (AI) to generate images (although it can also be used to manually load image files by using the Load Image button). The first element is the “image generation prompt”. This prompt can be used to generate images based on your ideas expressed in plain English. For instance, you can type “a dog riding a bicycle in the style of Pablo Picasso” and the AI will come up with an image that matches that request when you click the Suggest Image button. I just gave this one a try, and it came up with the following suggestion:
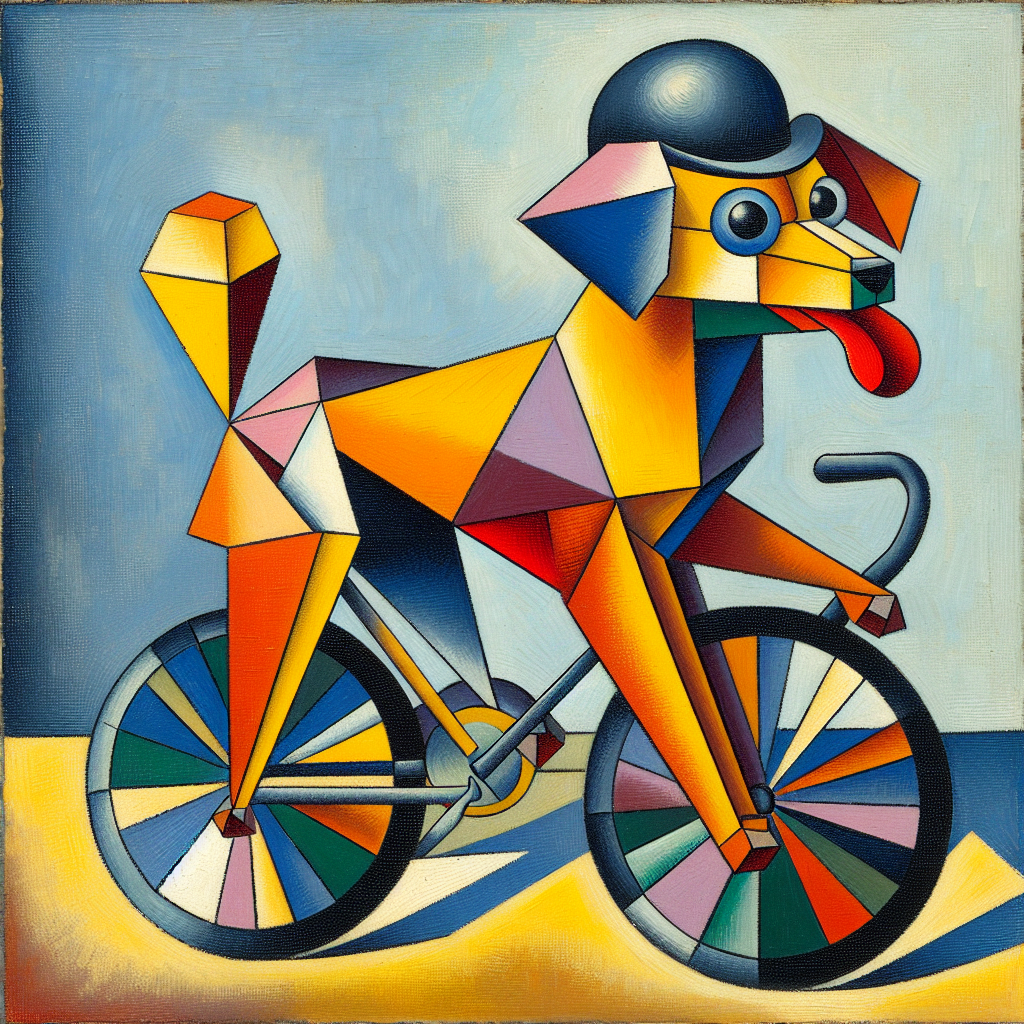
If you do not like the result, simply click the button again to get another suggestion (it will create something new every time), or, change your prompt to fine tune what you would like to create. I simply clicked the button again without changing the prompt, and it came up with the following suggestion:
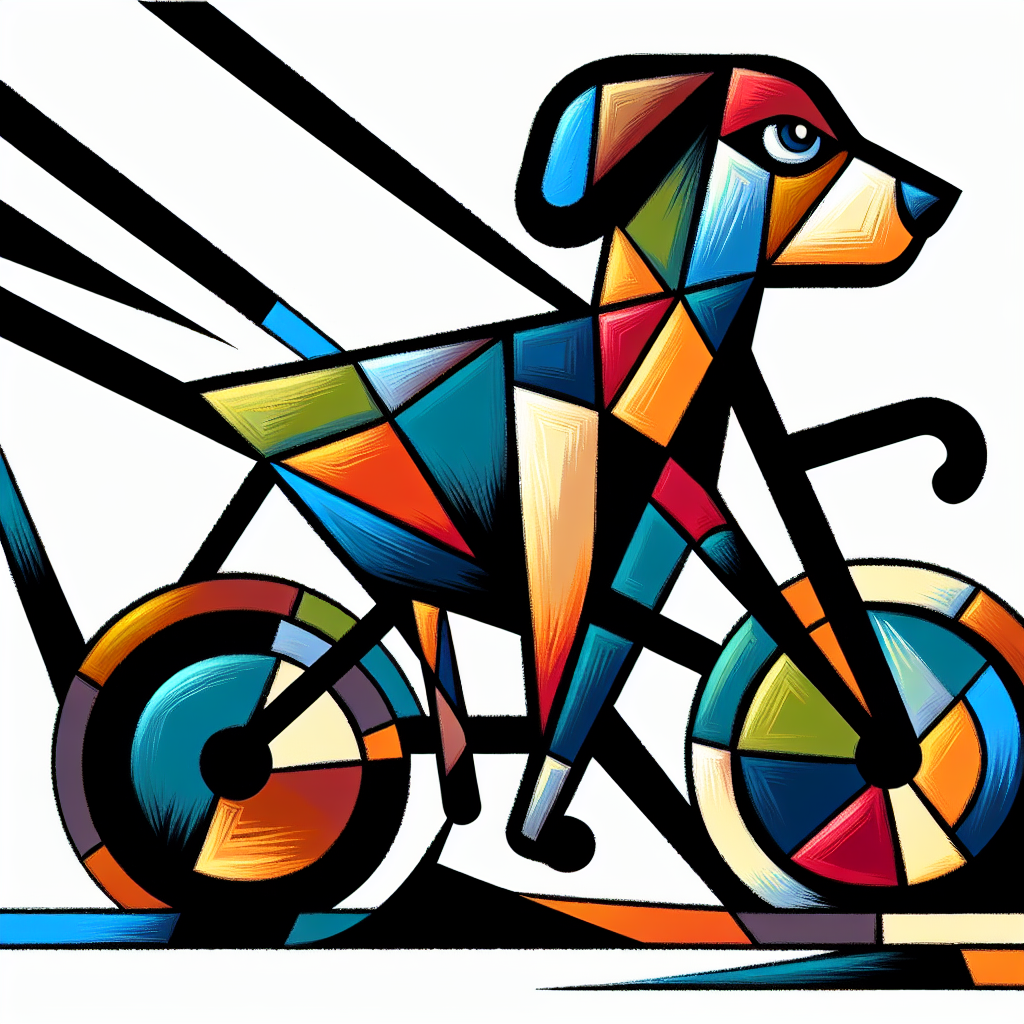
As you can see, the results are quite different each time you try, and they might vary wildly, depending on the prompt you choose. (In my case, it will always be in the style of Picasso, but had I not specified that, my second version could be drastically different from the first).
However, it will be difficult to think of fresh new prompts every time you need an image. This is what the Suggest Prompt button is for. It is extremely useful, because it invokes a separate AI that then tries to use the current content (such as the text of an article or blog post) to come up with creative ideas for images related to the item at hand. Consider this prompt our AI happened to suggest for an article related to real-time communications:
Example Prompt created by the AI:
Create an image that represents real-time communication in web applications with a futuristic and modern art style. Incorporate elements like race cars or rocket ships to metaphorically represent the speed and efficiency of real-time updates. Use bold and vibrant colors to create a visually striking image. Avoid using letters and numbers unless absolutely necessary for conveying the concept. For inspiration, think of movies like The Matrix and Tron, and futuristic cityscapes. Depict clouds and chat bubbles to represent real-time updates and communication. Be creative and make it cool! - Possible Art Style(s): Futuristic and modern. Possibly useful inspirations: Sci-fi movies, futuristic cityscapes, technology interfaces. Possibly useful metaphors: Race car, rocket ship, lightning bolts, network of connections. Possibly useful pop-culture references: The Matrix, Tron, Black Mirror. Possibly useful visual ideas that could be included: Clouds, real-time updates, chat bubbles, notifications.
Again, the AI will come up with new suggestions every time you click that button. You can also edit the prompt, if you would like to fine-tune it or have your own ideas and suggestions.
Note that it is possible to double-click an image in the list to open a detailed view of the image:
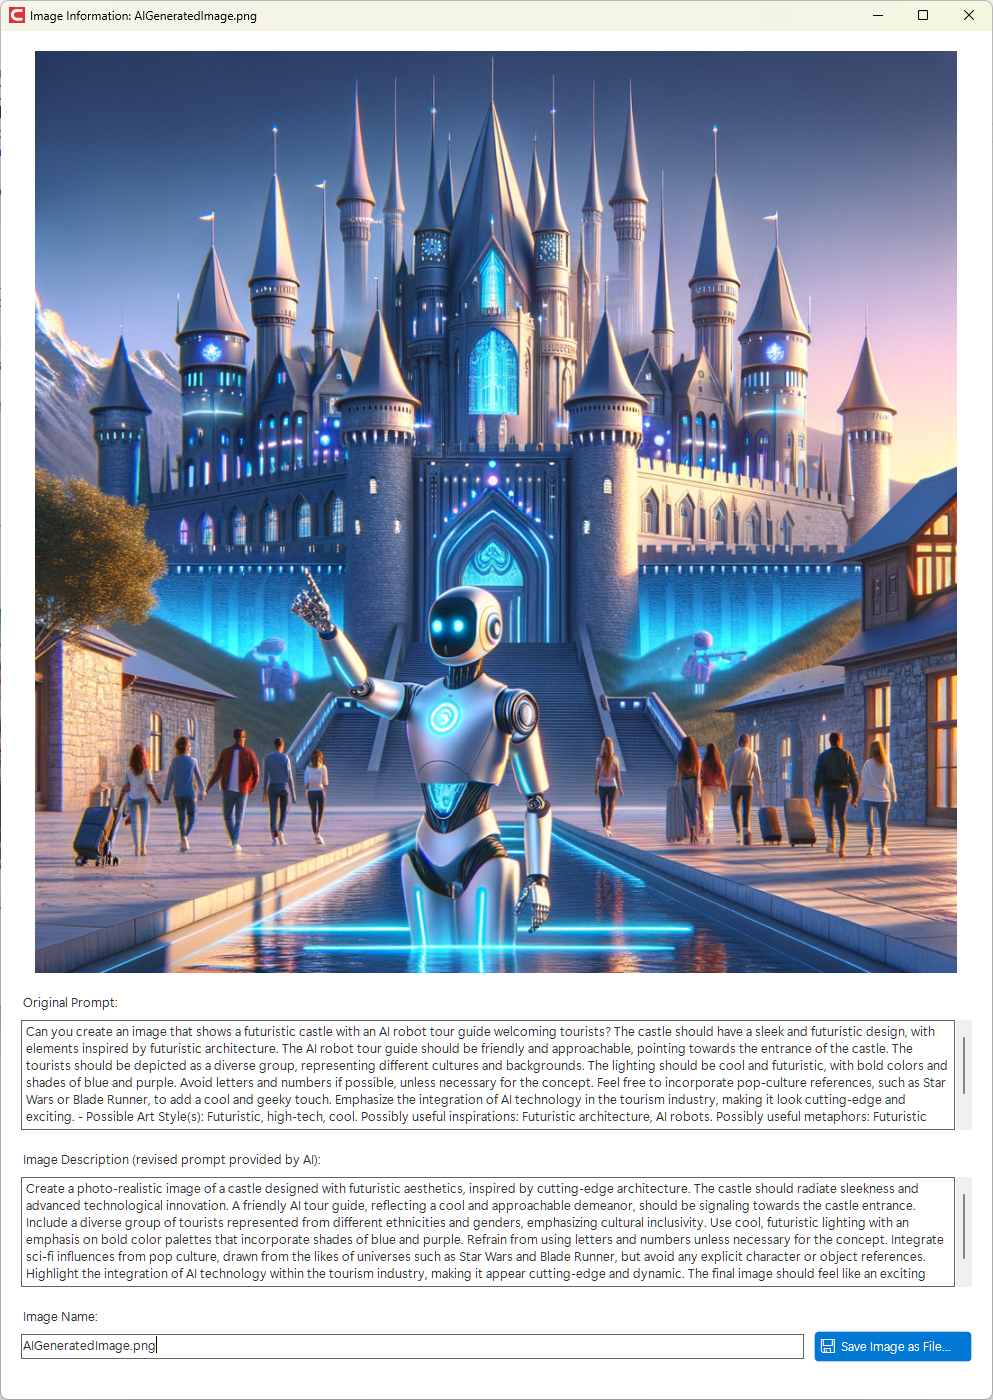
Note that this shows the image as well as the original prompt used to generate the image (assuming the image is AI generated and wasn't loaded from disk locally). In addition, the AI provides a “revised” prompt. This is often a description of the image or a slightlyh altered prompt used to generate the image. It provides some good insight into how the AI “thinks” about the image it just created.
There also is a file name and a button to save the generated image as a local file.
Note: Our system currently uses the DALL-E 3 image generation AI. (This will change over time). If you would like to use a different AI, simply copy the prompt and paste it into the AI image generator of your choice. Then, download the created art and load it into this UI using the
Load Imagebutton.
Using Image Composer to Create Standard Art Assets
Once you are satisfied with an image generated by the AI above, select the imasge in the list and click the Open in Image Composer button to launch Olympus Image Composer (see below). This triggers Image Composer with an appropriate template for your scenario. This usually means that a set of images is being created that are required with the asset you are dealing with (for instance, a CODE Presents event will need header images of various formats, images suitable for sharing on social media, video cover images, and so on). The exact details depend on the scenario, but usually, the base image generated by the AI (above) is used as a background image that is overlayed with other elements, such as text, logos, and more. The text provided is also based on the asset at hand (for an event, it will be things like the event title, the date of the event, the name of the presenter, and the logo will be appropriate for the event, such as a CODE Presents logo, or a CODE State of .NET logo, and so on).
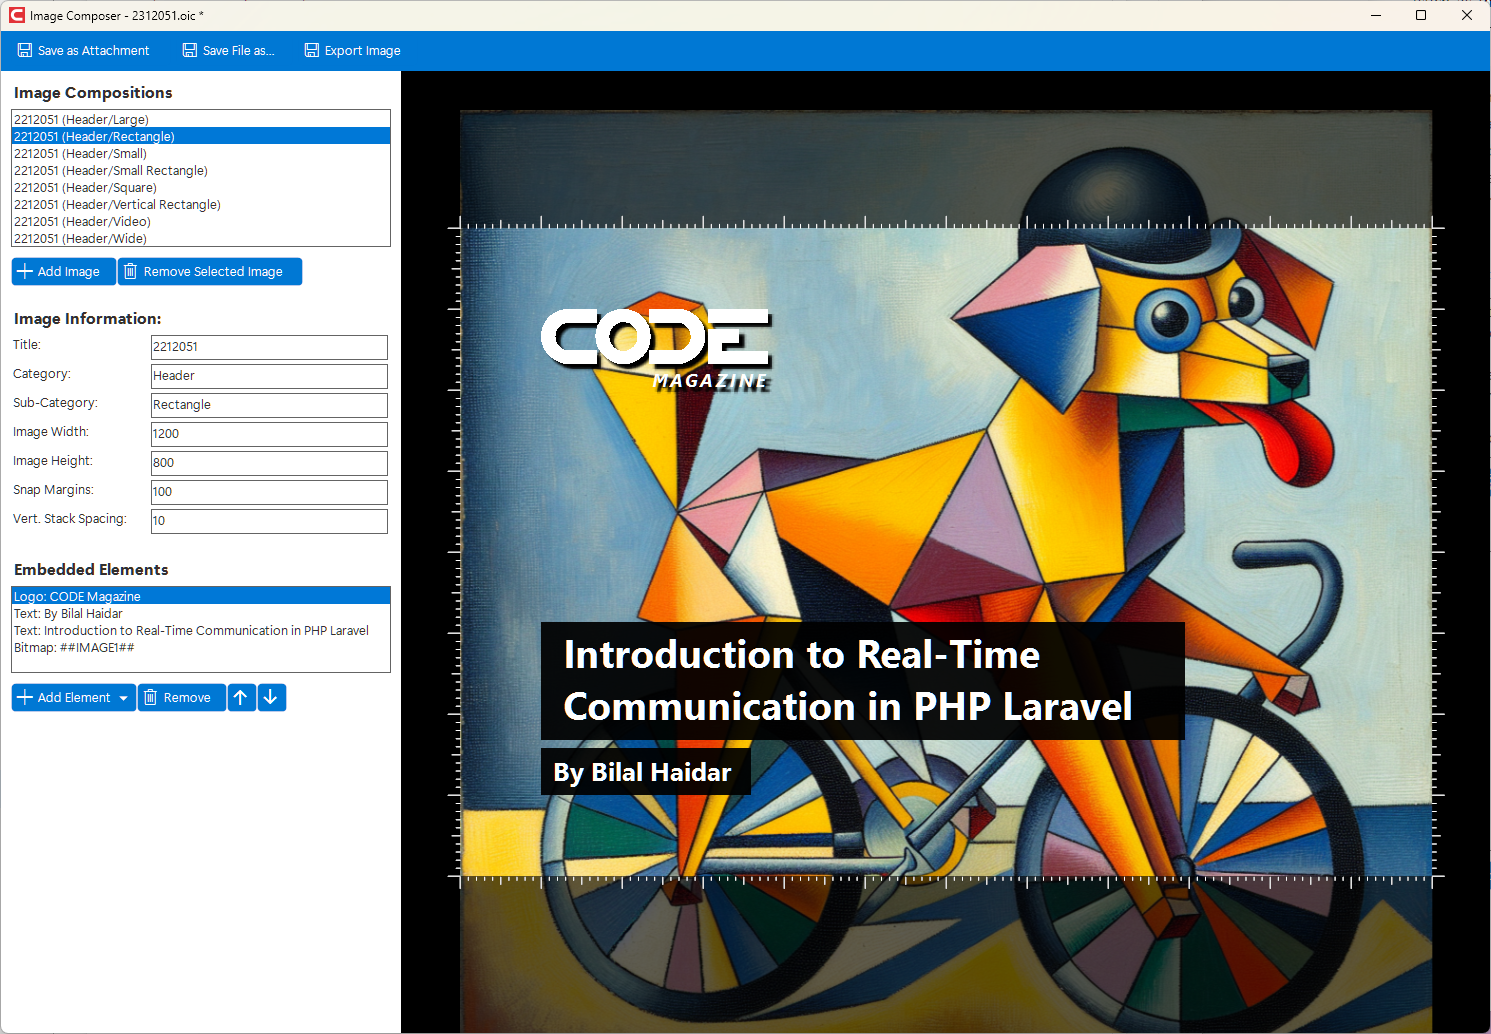
A detailed description of Image Composer's features can be found below, but some of the more interesting aspects of the above screen shot are:
- The top/left corner of the UI shows a list of all images. Image Composer works on more than one image at a time. This is called a “set of images” and they are always designed and saved together. To switch to a different image within the set, simply click on one in the list. (Don't worry… you do not have to save when switching between images… your changes will NOT be lost that way).
- When thus selecting an image, not only does the preview display of the image update, but also the properties on the left side of the screen. General properties of the image can be set there, such as the size of the image, and also business-related information, such as the categorization of the image. (Although in most cases, you do not have to change any of that, as the template and AI will have set it correctly).
- Below the image properties is a list of “embedded elements”. Each image within the set is composed out of sub-elements (hence the name “Image Composer”… although that is also an homage to Microsoft's defunct Image Composer product), such as images, text elements, and CODE logos. You can select elements, add and remove elements (such as adding another image file from disk), and change properties on individual elements.
- The main area of this UI is occupied by the preview image. This is the design surface, and you can directly select and manipulate individual elements on the design surface, just like in any other image editor (although with the supported features being geared towards our specific needs).
Note that each image in the set is created somewhat intelligently. Not just is there an underlying template that defines which images are in a set and what they are like, but the generator also intelligently places elements, sets element sizes, adjusts font sizes, removes unused elements, and so on. Therefore, the default version of the compositions should be quite close to your needs. But it is OK to fine-tune elements, such as changing font sizes, moving elements around, adjusting versions of logos that are being used, and (this one happens most frequently of all), slightly adjust the position and size of the background image.
Once you are happy with your composition, click Save as Attachment, which causes the whole composition to be saved in the underlying element's file attachments (such as article file attachments, or event file attachments) in the form of an OIC (Olympus Image Composer) file. Furthermore, each image within the set is exported as a high-quality rendering (the preview is optimized for speed and may be a bit grainy) and also filed into attachments with appropriate categories and sub-categories set to ensure that the images serve the purpose they were intended for.
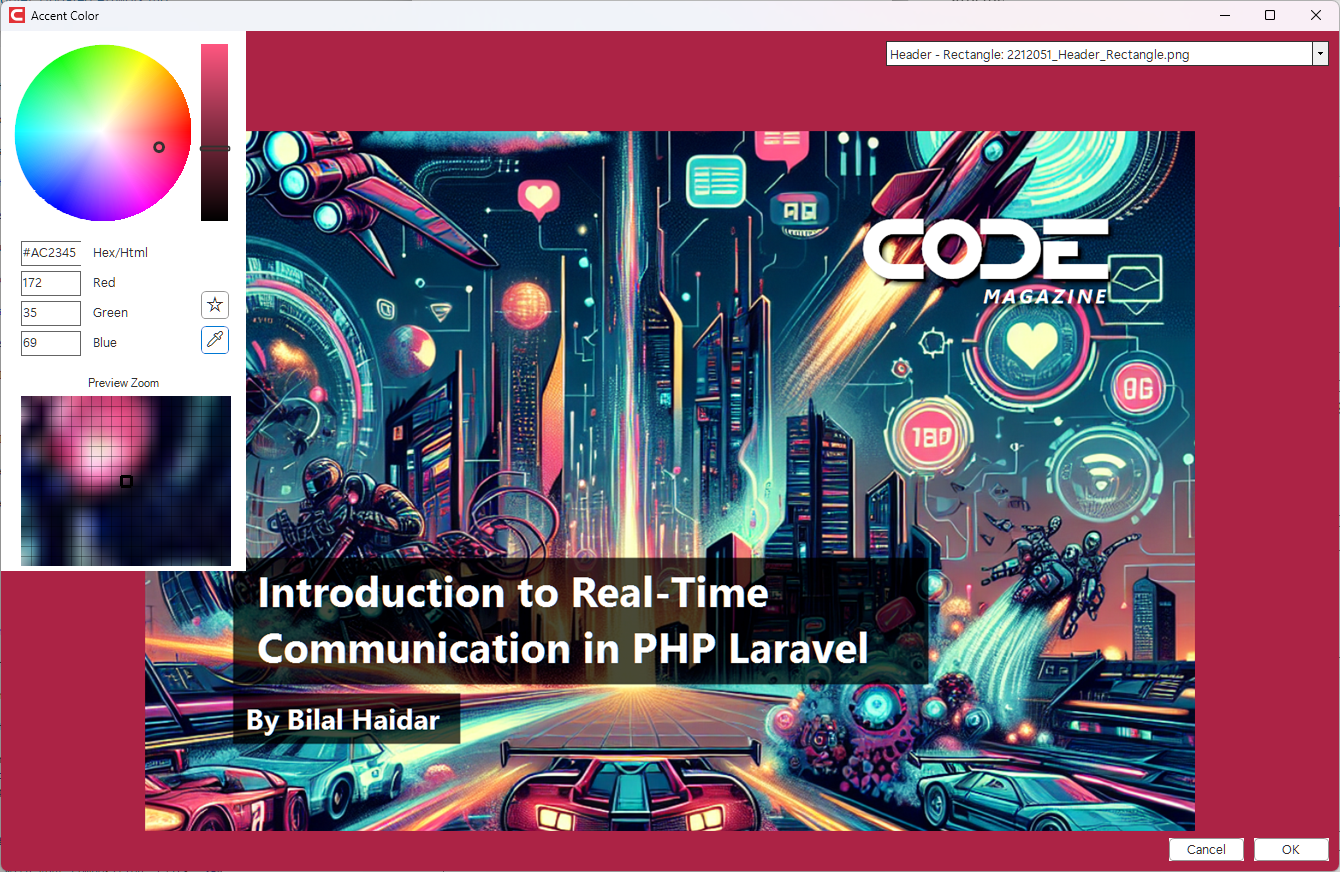
The only step that remains is (usually) to set the accent color of the item. Items such as articles, events, blog posts, and more, have accent color settings. Click on the color square of the accent color setting to open the color picker dialog. This dialog is now aware of the new images you created. You can now either manually pick a color that goes well with the image, or have the AI suggest a suitable accent color for you, but clicking the AI button.
Voila! You are now done creating a set of art assets for this item. As soon as the assets are saved, they will appear on web sites and other places.
Note: You can edit the OIC file at any point by double-clicking it in the file attachments list. It is also possible to attach multiple OIC files to a single item. However, when the assets get saved, it is possible to end up with multiple items in each category. This is not desired and you should manually delete the ones you do not want.
Note: It is also possible that the generation of these assets will override image files attached to an item, when their names happen to be the same. If all assets are created from OIC files, this is not a big deal, since they can easily be created from the OIC file. However, if the existing assets were created by some other means, one could end up accidently overriding other files.
Required Asset Formats
The following standard formats and categories/sub-categories are supported:
- Header/Large: This is a large header displayed across the top of an entity on the web page. Standard size is 1600x600 pixels.
- Header/Wide: This is a wide version of the large header, displayed across the top of an entity on the web page when the total height of the browser is too short to make the regular large header look good. Standard size is 1600x400 pixels.
- Header/Small: This is a header displayed across the top of an entity on the web page (in small sizes or mobile versions) or the mobile app. Standard size is 1000x600 pixels.
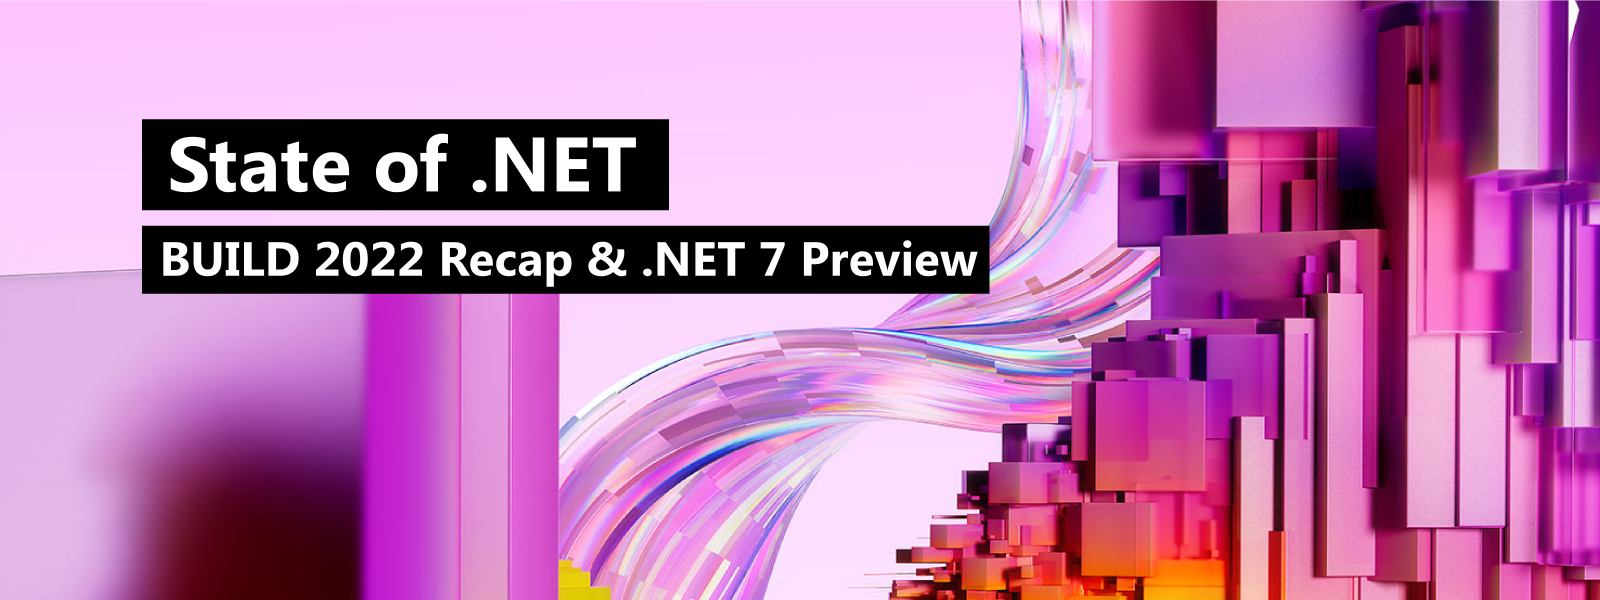
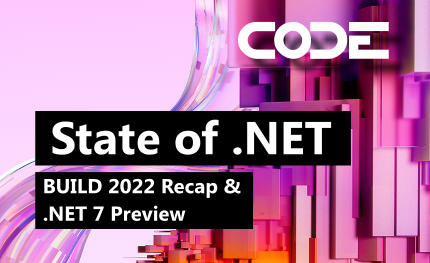
- Header/Rectangle: This is a version of the art asset that is mainly used to share on social media. Standard size is 1200x800 pixels. Since this is usually shared outside our page, it should have a CODE logo as well as information about the element shared (such as event date), since this isn't embedded inside other infomration on our site.
- Header/Vertical Rectangle: This is a vertical version of the rectangular asset. This is used in places such as the homepage carousel. Standard size is 600x800 pixels. Note that this version may be used stand-alone, so it should have a logo and other information embedded.
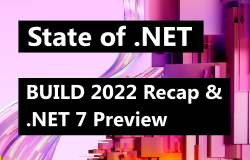
- Header/Small Rectangle: This is a small version of the rectangular asset. This is generally used in lists. Standard size is 250x160 pixels.
- Header/Square: This is a square version of the header, usually used in space-constrained lists. Standard size is 250x250 pixels.
- Header/Video: This is a version of the art asset used to display as a media player background asset. Standard size is 430x263 pixels. Note that this version is used stand-alone and should therefore have a logo. It will also be used for a recording from an earlier date, therefore, it should not have information such as dates in it (otherwise, it is getting dated too quickly).
Note: Assets are not necessarily displayed in the actual pixel dimensions. Often, they are displayed smaller, but especially in mobile device scenarios, that will result in higher resolution dispay.
Example Usage scenarios
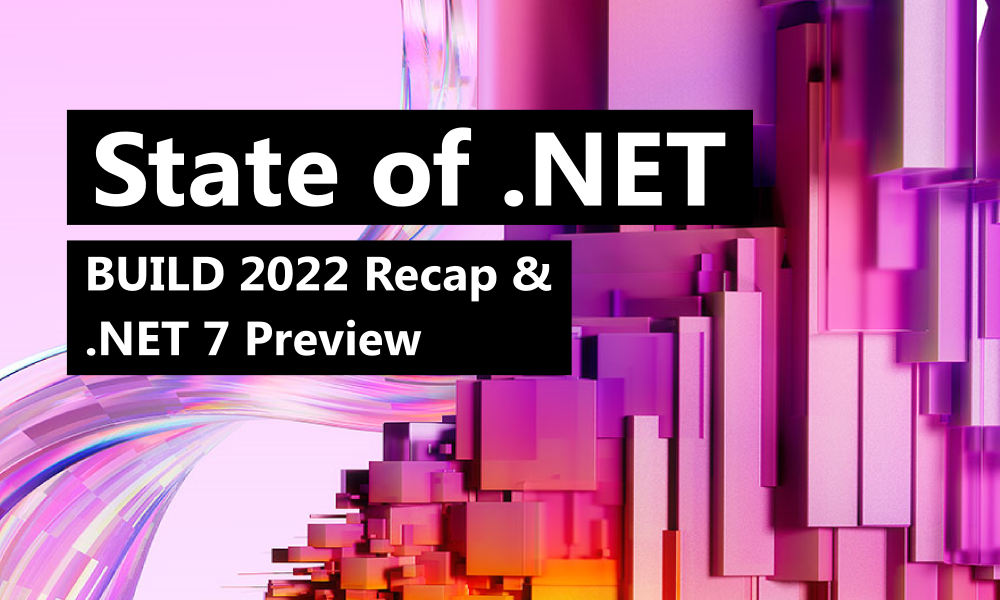
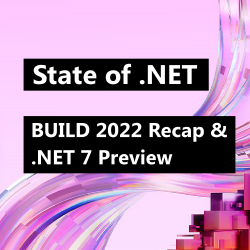
- The following is a large header used to display an event:
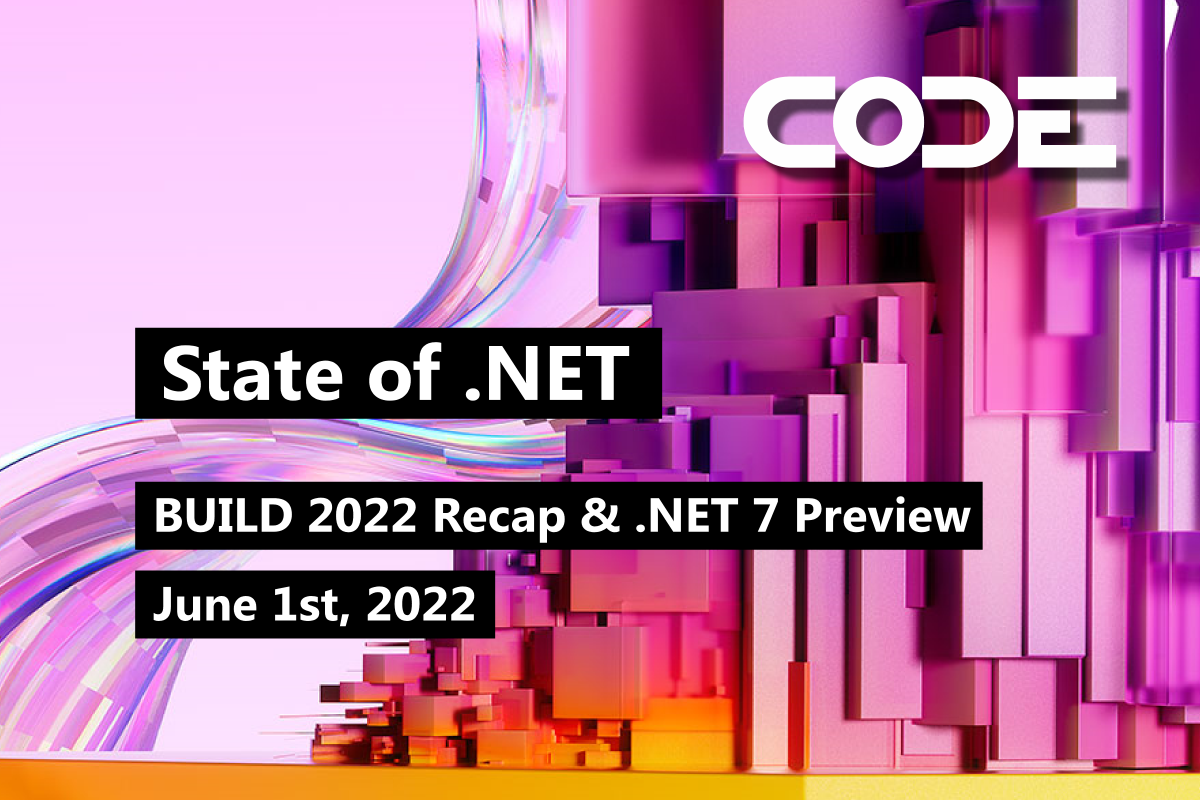
- This is the same page displayed in a window that is not as tall (wide header):
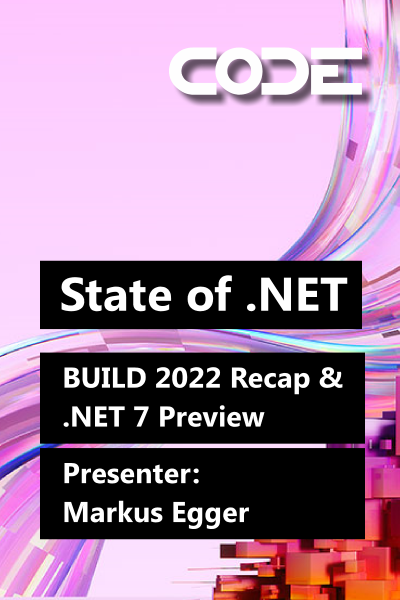
- This is what the same page looks like when displayed in a very narrow window, or on a mobile device (small header):
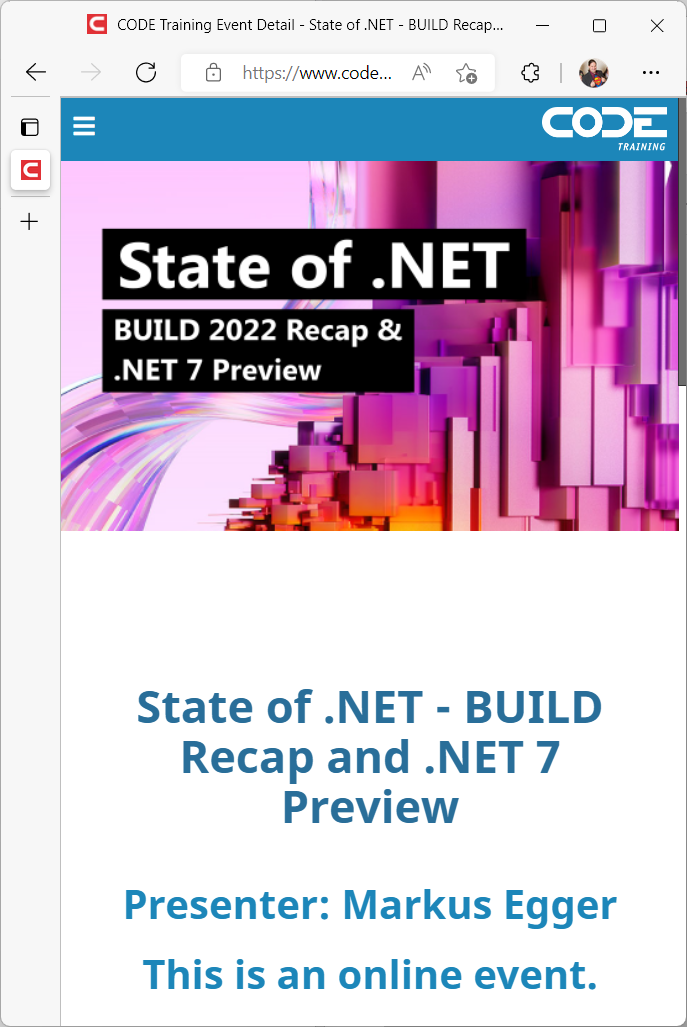
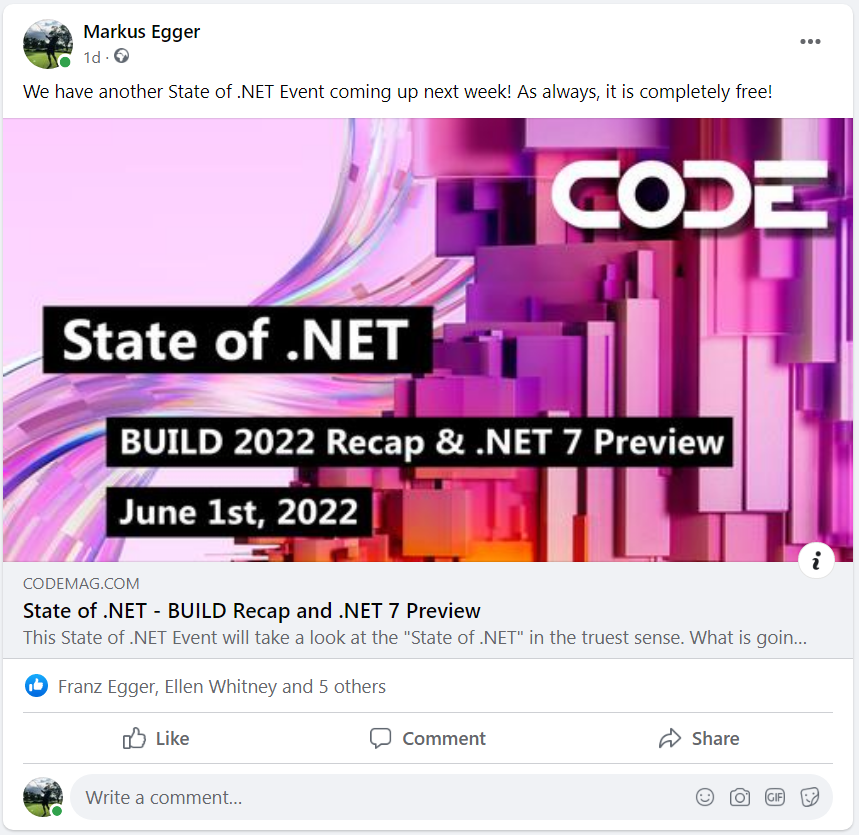
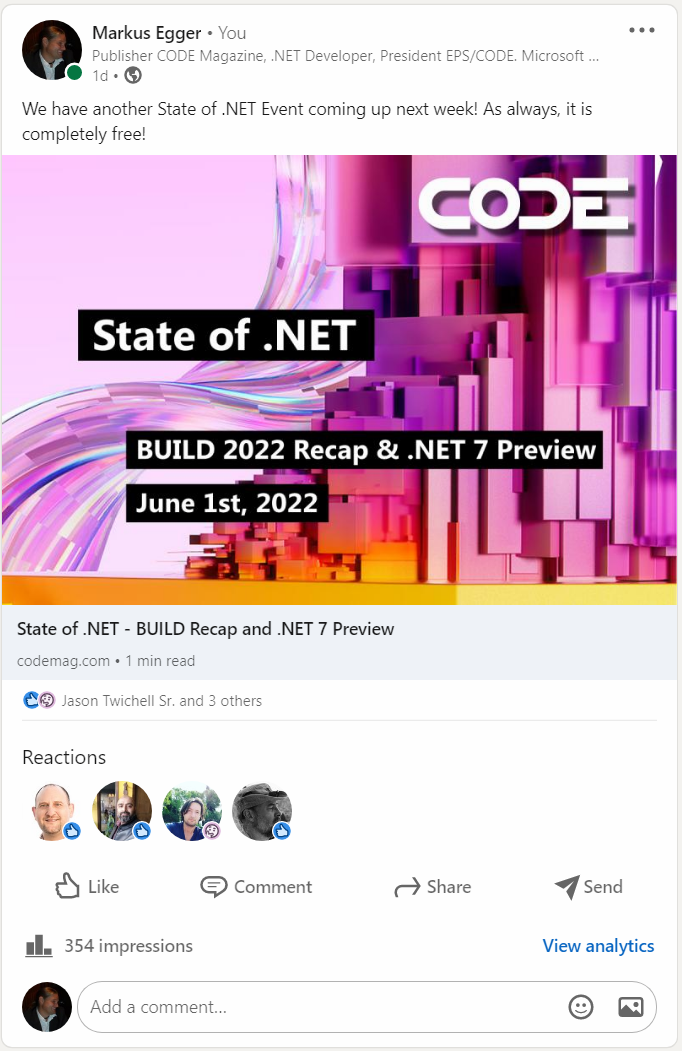
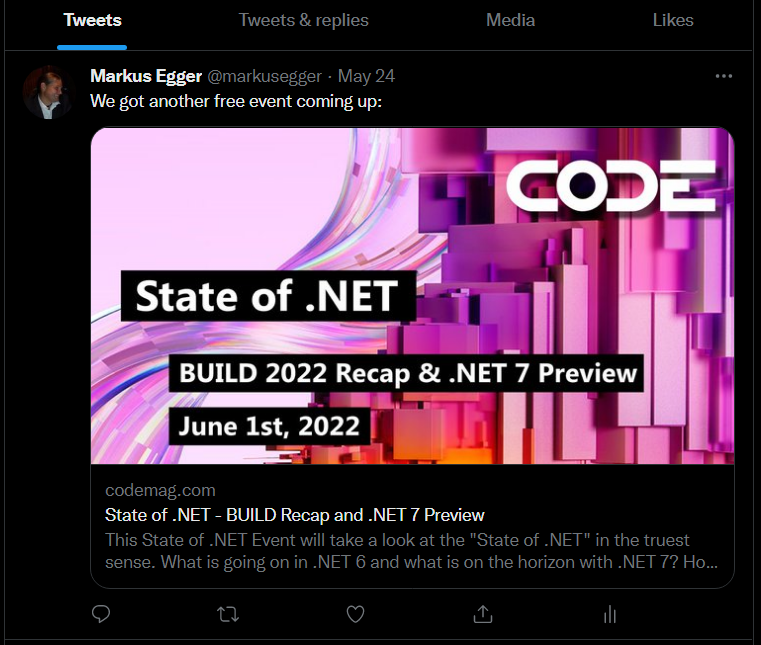
- When this event is shared on social media, the “header rectangle” format is used.
- Facebook:
- LinkedIn:
- Twitter:
- Facebook:
Olympus Image Composer
Detailed description of OIC features is currently a work in progress.