Setting up the Frontend - User Interface Development
*incomplete
Purpose: To provide options for choice of a frontend (UI) technology, and how to get it set up.
Vue
Install node.js
Update NPM. Using Windows CMD, enter:
npm install downloadInstall Vue CLI. Using Windows CMD, enter:
npm install -g @vue/cliAdd Visual Studio Code Extensions
- Vetur (formatter for Vue.js code files)
- Prettier (formatter for JavaScript files)
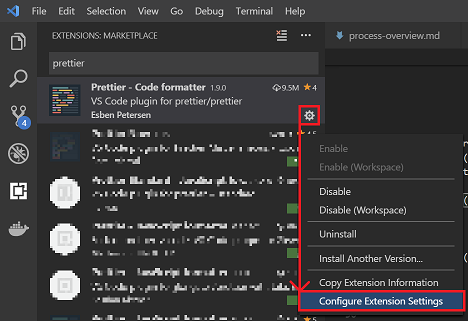
Click the cog (settings) icon, and click Configure Extension Settings from the menu
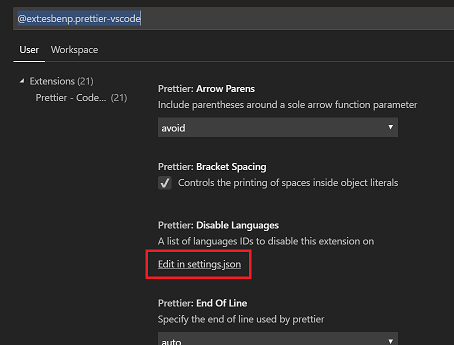
Scroll down and click on Edit in settings.json
Add a new line:
"prettier.printWidth":250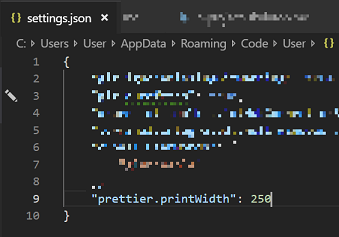
Tip: To update NPM, make sure to visit the gems and tips page.
Create New Vue Project
Open Visual Studio Code (VS Code).
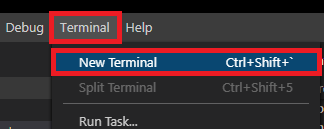
Open a Terminal within VS Code by pressing
Ctrl + Shift + `.Within the new Terminal, navigate to the desired location of your new project. This can be done by typing
cd <absolute-path>, whereshould be replaced by the path to your folder (i.e. C:\Users\User\Documents\Projects). Once your Terminal is at the desired location for your project, type
vue create <name-of-project>, whereshould be replaced by the name you wish to use for your project (i.e. project-tempest).
NOTE: Project names must be lowercase letters only, with no special characters (names can only contain URL-friendly characters).
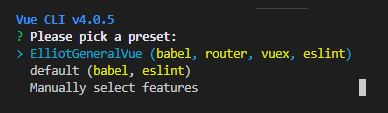
You will be provided with some options within the Terminal. You can navigate these options using the arrow keys. So to provide how to choose required components, navigate to Manually select features, and press the Enter key.
You will now see a list of features, which can be added to your project. Using the arrows keys once more, navigate up and down the list, and use your Spacebar to make selections ('*' means selected). Commonly used features for EPS include Router, Vuex, and Babel. Linting is also helpful, though this is up to personal preference.
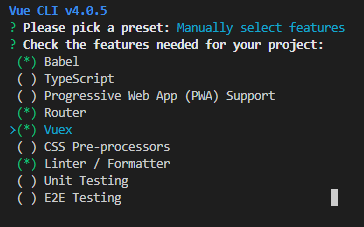
When you have finished making your feature selection, press the Enter key.
You will now need to answer some questions about features you selected, and customizations for your project. See below for examples:

- Use history mode for router? (if you do not use history mode, your website URLs will be prefixed with a hash (#); you can add this later, if you wish to skip at the moment).
- Pick a linter / formatter config (ES Lint with Prettier is a good option, given EPS utilises Prettier within VS Code).
- Pick additional lint features (Lint on save is fast, and provides instant feedback when things need changing).
- Where do you prefer placing config for Babel, PostCSS, ESLint, etc.? (This is your preference, though in a dedicated config file is useful, to separate it).
- Save this as a preset for future projects? (This is your preference, though is handy to have this all set up if you are going to make many projects which are similar).
The Vue CLI will now go through with what you requested, and create your project. This may take a little bit of time. Once it is complete, you will see the message Successfully create project
, and once again have access to use the Terminal. Following the success message for creating your project, vue will provide you two commands which you should now run:
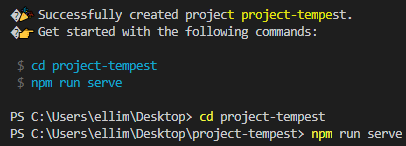
cd <project-name>- this will navigate your Terminal to the inside of the project folder of your project.npm run serve- this will build and run your project utilizing a development server. This means your project will be viewable for testing.- Go ahead and run both commands, if you haven't already.
Once npm run serve has finished executing, you will see that the project has been compiled, and where it is now running (likely on localhost, port 8080). If you hold the
Ctrlkey on your keyboard, and left-mouse click on the Local URL, you will be navigated to that address, where you will see the default Vue app up and running. Feel free to have a look at it, before continuing below.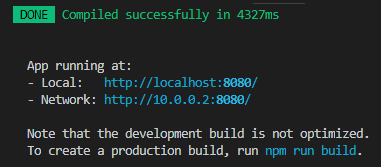
Back in VS Code, navigate to your Terminal once more. You will see that the message about your app running is still present. To stop your app running, press
Ctrl + Con your keyboard, and you will be prompted in the Terminal, as to whether you wish to terminate the application. Provide y, and press the Enter key.With access back in the Terminal, you can now install Vuetify. Do this by typing
vue add vuetify. Vuetify will begin installing into your project.Once installed, you will be provided with presets for Vuetify. Usually Default is a good option here, but for the sake of learning, navigate down the list to Configure (advanced), using the arrow keys, and then press the Enter key. You will be provided some options, see below:
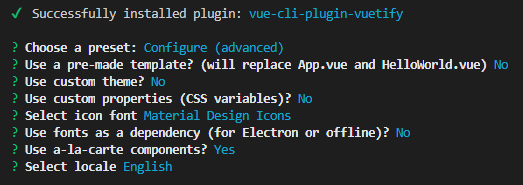
- Use a pre-made template? (will replace App.vue and HelloWorld.vue) Yes (only select yes for this, if you do not mind losing your current App.vue file configuration).
- Use custom theme? No (thus is for if you have your own custom theme which you wish to implement).
- Use custom properties (CSS variables)? No (if you have custom CSS variable that you have, you can provide them through this).
- Select icon font Material Design Icons (here you can select which font you would like to use; you can later add more).
- Use fonts as a dependency (for Electron or offline)? Yes (this asks whether you are OK with fonts being stored locally within your project, or whether they should be fetched when the project runs. Either is fine).
- Use a-la-carte components? Yes (The a-la-carte option provides a partial install for Vuetify, useful for apps which just wish to just use a few components, and not the full package).
- Use babel/polyfill? Yes (one useful part of utilising babel/polyfill is to help get your app working in older browsers).
- Select locale English (your selected locale language).
With Vuetify sucessfully added, your project is ready to go. Vuetify will provide you will many ready-made components, which will make development significantly faster Visit the Vuetify Documentation.
Cloning Vue Repository
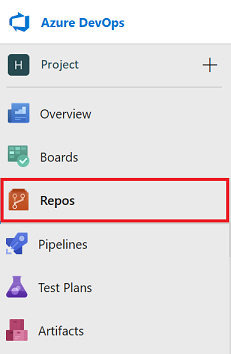
Navigate to the DevOps project you wish to clone, and select Repos.
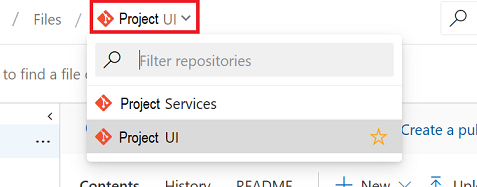
The Repository section will appear. Using the drop-down menu within the breadcrumbs at the top, select which repo you want to clone. When dealing with the frontend, this would be the UI repo.
With your repo selected, click the Clone button at the right of the window. The Clone repository context menu will appear.
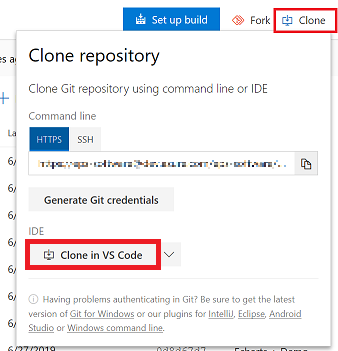
There are many ways to clone a repository, click the IDE drop-down menu and select Clone in VS Code.
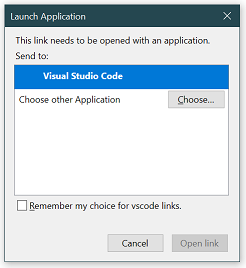
A small Launch Application window will appear. With Visual Studio Code highlighted, click the Open link button.
Once cloned, open the project with VS Code.
When cloning for the first time, you must run the node install command. This can be done in VS Code, by opening the Terminal (found from the file menu):
With the Terminal open, enter the following:
npm installThe initial install may take some time. To get the project running, see the chapter Running Vue Project
Running Vue Project
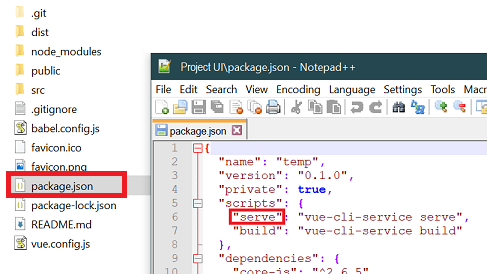
Start the project UI local web host by entering the following into the Terminal:
npm run serveThe keyword serve here is taken from the projects package.json file. If serve does not work, inspect that file, where you will find the keyword you need, alongside the build command.
With the build complete, open your browser, and navigate to: http://localhost:8080
Angular*
- Incomplete..