Object-Relational Mapping Project
Purpose: To provide instructions on connecting a project to a database, using Entity Framework and object-relational mapping (ORM).
.NET Core
Add a .NET Standard Class Library to your solution. Call it ‘ProjectName.ORM’.
Right-click the new project within the Solution Explorer, and select 'Manage NuGet Packages…'.
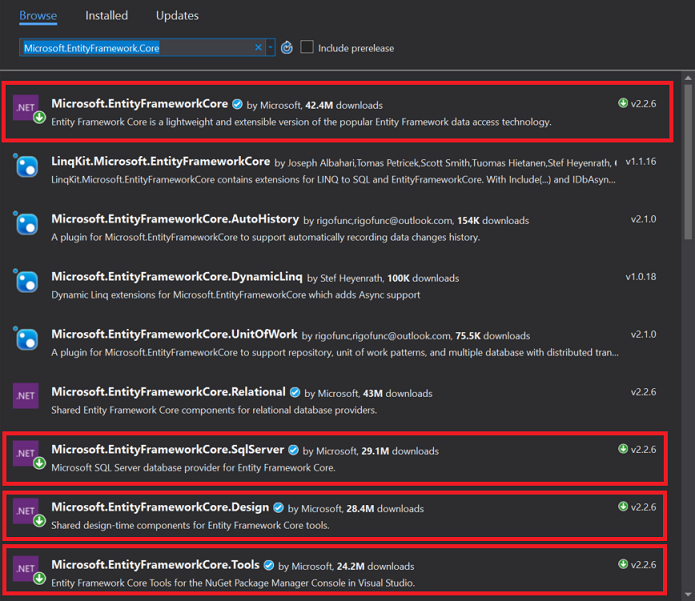
Within Package Manager, browse for:
Microsoft.EntityFrameworkCore. Within the list, find and install:- Microsoft.EntityFrameworkCore
- Microsoft.EntityFrameworkCore.Design
- Microsoft.EntityFrameworkCore.SqlServer
- Microsoft.EntityFrameworkCore.Tools

Open the Package Manager Console (View > Other Windows > Package Manager Console).
Using the drop-down menu alongside Default Project, select your new ORM project.
Click within the Package Manager command-line, and enter the following, changing the sections to match your setup:
Scaffold-DbContext "Server= server.address.com;Database= DBName; user id= DBUser;password= DBPassword;" Microsoft.EntityFrameworkCore.SqlServer -OutputDir Models
Following running this command, a folder will be created which will contain a generated class for each table within your Database, as well as a Context file, which provides a way to interact with your database. Inside the context file is the hard-coded connection string, which is what you entered previously.
Right-click your Implementation project, and add a Project Reference to the ORM project.
To utilize the database context, add a using statement to the ORM project at the top of your class, and then use a using statement within your code itself as follows:
using (var context = new ClockWorkContext())
{
    response.Roles = context.Role.Select(r => new IntSelectitem { Id = r.RoleId, Display = r.Name }).ToList();
}
.NET Framework
..incomplete..
